How to clean makeup brushes

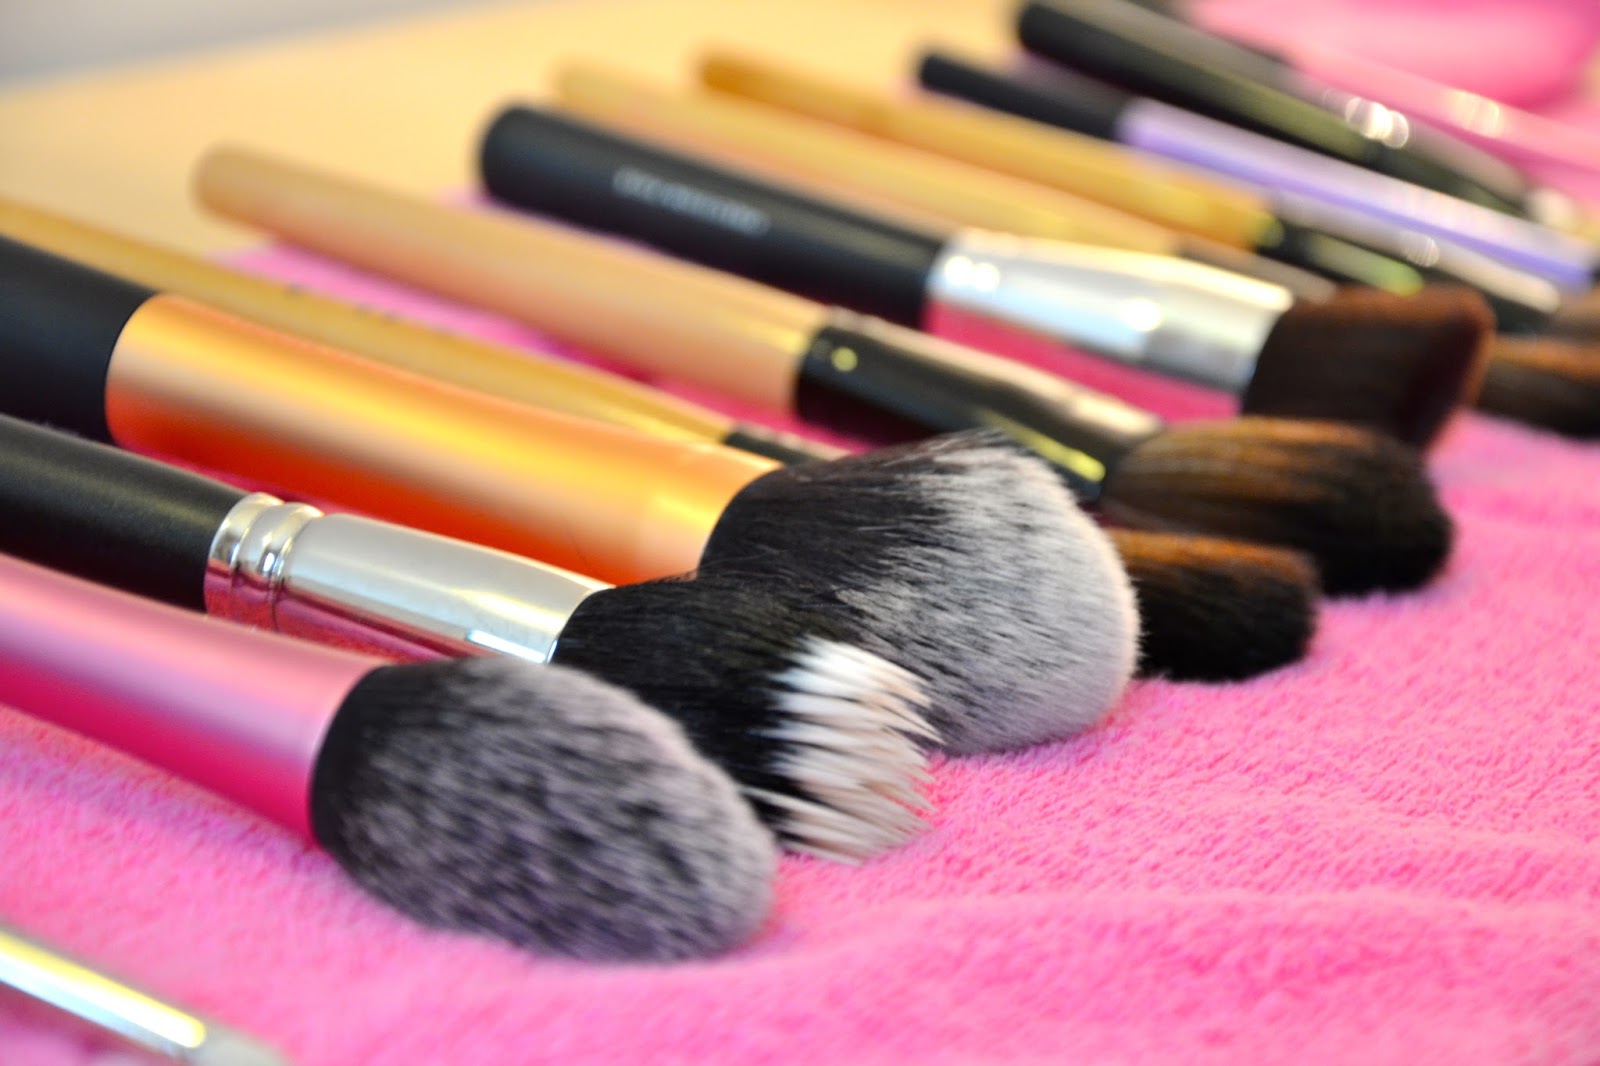
How to clean makeup brushes.

How to clean makeup brushes is pretty simple even if many people prefer to do this in different ways.

Dirty brushes tend to not distribute powders properly because of the makeup build up in them and they accumulate bacteria.

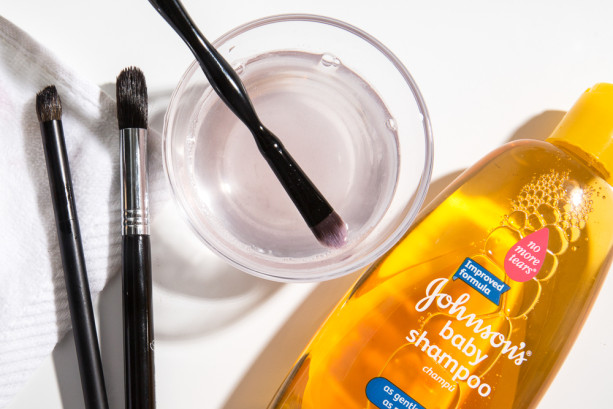
In beauty stores they sell many brush cleansers, but if you don’t feel like spending money after you already spent enough on your brushes, because they aren’t cheap at all, you can use baby shampoo or other gentle or natural shampoo or soap!

When washing with whichever soap or cleanser you choose, be sure to be very gentle to not  change the shape of the brush and avoid the steel part under the bristles because if it gets wet it can loosen the bristles and make them fall out or the metal part can rust. You should not use hot water but lukewarm to not ruin the bristles.

 I prefere to dry a bit the bristles by covering them in a towel and gently squeeze them with my fingers. After this sometime I have to spread, or pull the bristles back into their original shape. To let them dry I do not lay them on a towel because the bristles may dry flat changing the shape of my brush, so I set the brush down on a counter, with the bristle part hanging over the edge.

I let them dry over night, then they are ready to use again!

makeup-artist-brush-cleaning-how-to-1-613x409

Pulire i pennelli da trucco è abbastanza semplice anche se molte persone lo fanno in modi diversi.

Pennelli sporchi tendono a non distribuire polveri o creme correttamente a causa del trucco accumulato nelle setole e si accumulano anche batteri.

Nei negozi che vendono prodotti makeup potete trovare molti detergenti per i pennelli  ma se non avete voglia di spendere soldi dopo aver già speso abbastanza sui vostri pennelli, perché non sono a buon mercato a tutti, è possibile utilizzare shampoo per bambini o altro shampoo o sapone delicato o naturale!

Con qualsiasi prodotto decidete di lavare i pennelli, assicuratevi di essere molto delicati per non alterare la forma delle setole ed evitate di bagnare la parte metallica che si trova sotto le setole, perché bagnandosi può allentare le setole e farli cadere o la parte metallica può arrugginirsi.

Si consiglia di non utilizzare acqua calda, ma tiepida per non rovinare le setole.

Io preferisco drenare un po’ l’acqua assorbita dalle setole coprendoli con un asciugamano e stringerli con la mano. Dopo questo passaggio a volte è necessario allungare e separare le setole per farli tornare alla forma originale.

Per asciugarli io non stendo i pennelli su un asciugamano perché le setole possono cambiare forma diventando piatti. Metto i pennelli su un tavolo lasciando la parte delle setole sospesa dal bordo.

Li lascio asciugare per tutta la notte e la mattina seguente sono pronti da usare!

Follow me on my social networks!

http://instagram.com/worldoftemptations/

https://twitter.com/worldoftempt

https://www.facebook.com/worldoftemptations

https://plus.google.com/109584129253522424431/posts

Pumpkin 3D Cake

Pumpkin 3D Cake.

Pumpkin 3D Cake… this will look great on your table for a Halloween dessert… or simply a Fall one!

Questo pumpkin 3D cake starà una meraviglia sul vostro tavolo ad Halloween o quando ne avete voglia!

b4a93e5e01d4dca19f7a5e924dc98b53

As you can see it is very simple!

All you need to do is bake two bundt cakes, you can choose any flavour and you can decide to make all the ingredients from scratch or buy them in the supermarket. You can also use any size of bundt cake pans, even mini ones to make mini pumpkin cakes and they will look adorable!

Once you have baked your cakes you just fill it with what you decided to put in it and frost it with buttercream frosting, cream cheese frosting, whipped cream or even mousse.  For the center you can use a muffin, a twinkie or even an icecream cone.

And there you go! A perfect cake that is absolutely beautiful!

Come potete vedere è molto semplice!

Tutto quello che dovete fare è cuocere due ciambelle dal gusto e dimensione che preferite. Una volta pronte tra le due torte mettete la farcitura che desiderate e copritela con un frosting al burro, panna montata o anche mousse. Per la parte centrale potete usare un muffin oppure un cono.

Ed è fatto! Una torta perfetta è stupenda!

Follow me on my social networks!

http://instagram.com/worldoftemptations/

https://twitter.com/worldoftempt

https://www.facebook.com/worldoftemptations

https://plus.google.com/109584129253522424431/posts

Pumpkin Decorating Ideas

Pumpkin Decorating Ideas.

Pumpkin Decorating Ideas easy to copy and cheap to make!

Qui alcune idee per decorare le vostre zucche per Halloween!

1- Dracula mini pumpkins! If you have some mini pumpkins around, all you have to do is buy some vampire dentures and pins that have a red tip at the end to make these:

Mini zucche di Dracula! Se avete delle piccole zucche, tutto quello che dovete fare è comprare delle dentiere di Dracula e spille con la punta rossa per ottenere questo:

46ed8e1df2b73d6048a7c0d5caea168d

2- If you want some fun and colourful pumpkins around your home try to melt with a blow dryer some crayons on a pumpkin!

Se volete delle zucche divertenti provare a sciogliere sulle zucche dei colori a cera con un asciuga capelli!

11e86bda152964ca274c8deb5a9b2188

3- If you don’t feel like painting or carving faces on pumpkins you can make these adorable ones by just making holes in them and buying some cheap mice in a toy store!

Se non avete voglia di pitturare o fare delle sculture potete creare queste simpatiche zucche con dei topolini di plastica e semplicemente facendo delle buche nella zucca!

e1e7f043e9e0e04ee215ba0a6a39816f

4- Try this very fast pumpkin decorating idea… just put  or wrap pumpkins in black decorated tights…

Provate questa decorazione super veloce… tutto quello che dovete fare è infilare le zucche dentro dei collant con decorazioni o di pizzo!

enhanced-buzz-20972-1378965143-0


5- If you have any old fabric with lace designs on it you can cut them and glue them on your pumpkins!

Se avete della vecchia stoffa con disegni in pizzo potete ritagliarli ed incollarli sulle zucche!

enhanced-buzz-13880-1378961700-16


6-  Using some glitter you can create some glitter pumpkins with whatever designs you prefer, even polka dots!

Usando glitter e colla potete creare la fantasia che più vi piace sulle zucche…

enhanced-buzz-27954-1378963453-28


7-  And why not a grumpy cat pumpking?

E perché non dipingere un grumpy cat???

enhanced-buzz-15251-1378962599-5

Follow me on my social networks!

http://instagram.com/worldoftemptations/

https://twitter.com/worldoftempt

https://www.facebook.com/worldoftemptations

https://plus.google.com/109584129253522424431/posts

Autumn Crafts

Autumn Crafts.

Autumn Crafts are my favourite because you can use beautiful warm shades to make your house look cozy and bring those red, Yellow an orange shades inside!

Here are some ideas to copy:

Il fai da te autunnale è il mio preferito perché puoi usare colori caldi per dare alla vostra casa un aspetto accogliente portando dentro quelle meravigliose tonalità di rosso, giallo e arancio! Eccovi alcune idee da copiare:

  • Autumn Tree Snow Globe.

All you will need is a mason jar, plastic or foils Leaves, a small tree branch,  glycerin and a hot glue gun.

Trim the branch and glue it on the lid of the jar. Glues some Leaves to the tree. Fill the jar with water and add some glycerin, this will allow the Leaves to fall down slowly. Now just glue the lid back on!

Tutto quello che vi serve è un vaso di vetro mason, Foglie di plastica, un piccolo ramo di un albero, glicerina e una pistola di colla a caldo.
Tagliare il ramo e incollatelo sul coperchio del vasoIncollate alcune foglie sull’albero. Riempite il vaso con acqua e aggiungere un po ‘di glicerina, questo permetterà le foglie cadere lentamente. Ora basta incollare il coperchio su vaso!

fall tree

  • Ombre Pinecones.

All you need to do is paint the tips of your pine cones using different shades of one color. I prefer shades of Yellow, orange and red but you can use what you desire.

Tutto quello che dovete fare è dipingere la punta delle pigne utilizzando diverse sfumature di un colore. Io preferisco sfumature di giallo, arancio e rosso ma è possibile utilizzare ciò che si desidera.


Ombre-Pinecone-Layers 51f8d08dacb7fabf1a70243137b66ddb

  • Sweater Candle Holder.

If you have old sweaters this is the time to use them! You can use them to decorate vases, mason jars or empty candle jars to make an unique Autumn – winter house decoration!

Se avete vecchi maglioni questo è il momento di usarli! Potete usarli avvolgendoli attorno vasi o contenitori vuoti di candele per creare una decorazione autunnale – invernale unico!


timthumb IMG_6207

  • Colored Acorns.

Another simple and inexpensive home decoration is filling vases or bowls with colored acorns! Very simple to make, and you can color them with paint, nail polish or with colored fabric!


Un’altra decorazione semplice ed economica consiste nel riempire vasi o ciotole con ghiande colorate! Molto semplice da fare, e si possono colorare con la vernice, smalto per unghie, colori acrilici o con tessuto colorato!

cec1f5a4aed384694c9a81351be5fc28 8eb8a510c471867cbd56bbca077f01df

Follow me on my social networks!

http://instagram.com/worldoftemptations/

https://twitter.com/worldoftempt

https://www.facebook.com/worldoftemptations

https://plus.google.com/109584129253522424431/posts

DIY Lemon Lip Balm

DIY Lemon Lip Balm.

DIY Lemon Lip Balm with only a few ingredients!

You will need:

  • 1/2 oz. Beeswax
  • 1/2 oz. Coconut Oil (1 Tbsp.)
  • 1/4 oz. Cocoa Butter (1/2 Tbsp.)
  • 1/4 oz. Shea Butter (1/2 Tbsp.)
  • 15 drops of safe for digestion Lemon Essential Oil
  • Small Lip Balm Jars or Tubes 1/4 or 1/2 oz.
  • Saucepan
  • Glass measuring cup or container
  • Spoon

Combine beeswax, coconut oil, cocoa butter, and shea butter in a glass measuring cup or other glass container. Set the glass in a saucepan filled with 1-2 inches of water. Heat the water and stir the ingredients until they are completely melted.

 Remove the glass from the sauce pan and add 15 drops of  lemon oil to the mixture. Stir quickly before the mixture begins to harden.

Pour the mix into small jars and let the jars set until cool and the contents have hardened.

lip%20balm

Cosa vi occorre:

  • 1 cucchiaio di cera d’api
  • 1 cucchiaio di olio di cocco
  • 1/2 cucchiaio di burro di cacao
  • 1/2 cucchiaio di burro di karitè
  • 15 gocce di olio essenziale di limone sicuro per la digestione
  • piccoli barattoli
  • pentolino
  • contenitore in vetro
  • cucchiaio

Unire cera d’api, olio di cocco, burro di cacao, burro di karitè  in una tazza di misura in vetro o altro contenitore di vetro. Impostare il vetro in una pentola riempita con 1-2 pollici di acqua. Riscaldare l’acqua e mescolare gli ingredienti fino a quando non sono completamente sciolti.

Rimuovere il vetro dalla casseruola e aggiungere 15 gocce di olio di limone alla miscela. Mescolare velocemente prima che la miscela comincia a indurirsi.

Versare il composto in piccoli vasetti e lasciare a raffermarsi e raffreddarsi.


Follow me on my social networks!

http://instagram.com/worldoftemptations/

https://twitter.com/worldoftempt

https://www.facebook.com/worldoftemptations

https://plus.google.com/109584129253522424431/posts

Summer Centerpiece Ideas!

Summer Centerpiece Ideas!

It’s summer, patios are up and we are getting ready for bbq season… so why not have even some cute centerpieces?

Here are some ideas easy to copy!

Qui alcune idee per centro tavola dall’aspetto estivo per le vostre cene all’aperto!

Did you ever think of coloring your pineapples?

043d5cd1bdade5dd8e0240417f9d9e14

What about using cocktail umbrellas??? all you have to do is stick them into a sponge ball!

..

71800b1cddcfe45ad4d46fb12a1f14ee

… You can use your childrens bukets like this…


bee313555b14e7ce71018a05eab1613b

… Some candle centerpieces…

f6be8a43294748b6e2d239d9823d75c1 dbb80960df89def9e0148c249d01a408 a971bf31b7bbfabbe46a149b00a44ca7


… Some floral ones…


goblet_centerpiece-300x300 bd92638ed01575fab0ab2dfc29d2b0c4 8925551b8198347fa72759a19a7c8990

And you can follow the pictures to make this simple but beautiful one!


03b25375a9886c14e3ecd51508a3cdfa

Follow me on my social networks!

http://instagram.com/worldoftemptations/

https://twitter.com/worldoftempt

https://www.facebook.com/worldoftemptations

https://plus.google.com/109584129253522424431/posts

DIY Peel Off Mask For Blackheads

DIY Peel Off Mask For Blackheads.

DIY Peel Off Mask For Blackheads just like the one you would buy in a store!

You will need:

  • 1 egg yolk
  • 1 tablespoon of gelatin
  • 2 tablespoons of milk

Make sure your face is clean and steam it to open pores.

Lightly beat the egg yolk.

melt gelatin with milk, let cool then add the egg and mix well.

At this point spread over your face and let sit for about 30 minutes. After peel off, rinse with warm water and then pass some cold water to close the pores!


מהו-פילינג


Per preparare una maschera per rimuovere i punti neri avete bisogni di:

  • 1 albume d’uovo
  • 1 foglia di gelatina
  • 2 cucchiai di latte

Assicuratevi che il vostro viso è pulito e se potete lasciate il vostro viso nel vapore per qualche minuto per aprire i pori.

Sbattete leggermente l’albume.

Sciogliete la gelatina con il latte. Lasciate raffreddare e poi aggiungete l’albume.

Spalmate il composto sul viso e lasciate riposare per circa 30 minuti. Dopo levatela come se fosse un adesivo! passate dell’acqua calda sul viso, e poi fredda per richiudere i pori.

Follow me on my social networks!

http://instagram.com/worldoftemptations/

https://twitter.com/worldoftempt

https://www.facebook.com/worldoftemptations

https://plus.google.com/109584129253522424431/posts

Summer Wreath Ideas!


Summer Wreath Ideas!

Summer Wreath Ideas! So pretty, so easy to make! You might want to copy one of these…

What screams summer more then flip flops and beach bags? so here is how to use them in a wreath!

d029b66c1c35b7adc3b083124017b45b

7b9f3ac68f0ace20983f6e2c25368e26

And here is where you can hang your umbrella during the summer with some bows and flowers!

d2ac4ff00fc7515f63d313304ece0b85

… And here how to use your rain boots!

8c6841041e78aac76a7f7cb2c5e9737c

This one is made with grape vine and butterflies cut outs from news papers!

69bc661d60def494f3589cf74f1094de

… Awesome way to use a straw hat with some flowers…

2e07efe7f5a2a4f522c23632472da349

918bfb1ccd8f70fd2254058629eb5f73

Follow me on my social networks!

http://instagram.com/worldoftemptations/

https://twitter.com/worldoftempt

https://www.facebook.com/worldoftemptations

https://plus.google.com/109584129253522424431/posts